If for some reason you’re just tuning in now, the short, short version of what’s going on is that an amateur cosplay creator (me) was gifted a Black Series Star Wars helmet to jazz up all Buffalo Bills style. I took the project several steps too far and now you’re all stuck with me.
In the last chapter I detailed the painstaking process of fixing a spray paint mistake I made, and began doing some more shaping on a Mandalorian-style breastplate. As I near the point where I can do things that might resemble finishing my work, it occurs to me that I need to make some decisions and get in a little more practice with my techniques. There’s some super fun stuff at the end of this article in my opinion.
Previous installments for this project:
Buffalo Beskar Part 1
Buffalo Beskar Part 2
Buffalo Beskar Part 3
Buffalo Beskar Part 4
Remember way back in Part 2 I discussed that I was using salvaged plastic from cat litter buckets as my primary material for the armor breastplate. I pointed out that the plastic type is polypropylene or “PP” for short. I regaled you all with the various ways that render PP a terrible choice for the project, and the only reason I was using it was because I had a bunch already available.
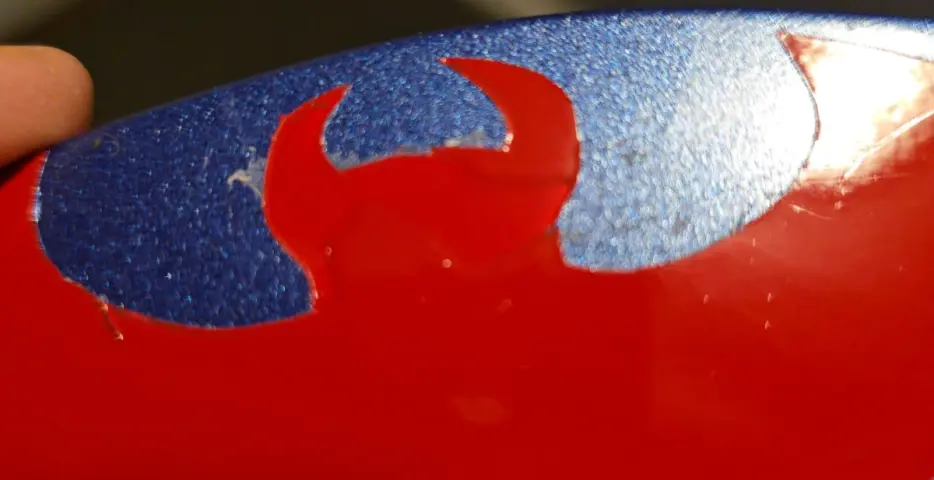
For the breastplate, I’ve pretty much overcome the shaping issue due to the fact that the plates don’t require any extravagant molding. When it comes to paint, so far I’ve been pretty pleased with the paints I’ve bought. PP is supposedly very paint resistant, but I did deliberately buy paint made for plastic and that’s seemingly paid off (see below). However, the one barrier that’s been a true headache is that PP despises your normal glues.
Now I could have made everything a single sheet and done a few tricks to simulate some depth, but recall that in every part of this series I’ve alluded to the fact that I tend to overdo things. You might remember then that my breastplate design uses multiple plates to go beyond simulated depth. Here are the four plates again to show you what I mean.
Now what I haven’t show you is that I actually will be making this out of SIX plates. I think the main/top chest piece needs to be built up to look its best and will be triple layered, adding two more sheets into the mix. If PP played well with epoxies this would be a breeze. I did try gluing with conventional types and the results were terrible.
That said, you can buy special glue that does a great job. The issue is that it comes in small quantities and even just doing the perimeter of the top part of the chest with three plates thick would need a lot. So I looked for a better solution for the main bonding. I decided to go mechanical.
Rivets and rivet...


